Top Tips of Using Quick Selection Tool Efficiently
When you want selectively edit part of your photo, apply color and tonal adjustments to a specific area, first you must create a selection in the area. The Regional Edit module of PT Photo Editor provides you several selection tools that suits different kinds of selections.
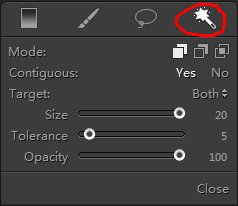
The Quick Selection Tool is situated in the tool strip below the Navigator in Regional Edit module. As it’s named, it can help you select an area quickly by making a selection based on your mark automatically. This tutorial will show you 4 tips of using Quick Selection Tool well.
Top Tips of Using Quick Selection Tool
1. Choose a right target – Color/Luminance/Both.
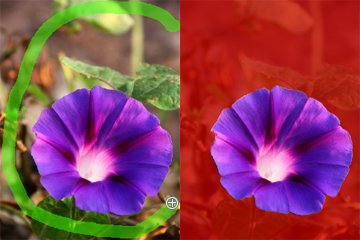
The Quick Selection tool will automatically select the area based on the target. For example, if you choose Color, the Quick Selection tool will select the pixels of similar color with your click or drawing. So before marking an area, choose a right target according to its texture.
A. Choose "Color" as Target

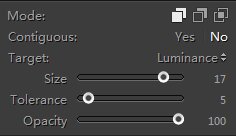
B. Choose "Luminance" as Target

C. Choose "Both" as Target
2. Set a proper Tolerance for the marked area.
For Tolerance, if you set a low value, the Quick Selection Tool will only select pixels very similar to the marked pixels, while if you set a higher value, a broader range of pixels will be selected. Usually, when you mark a line in the image, you'd better set a lower Tolerance value.
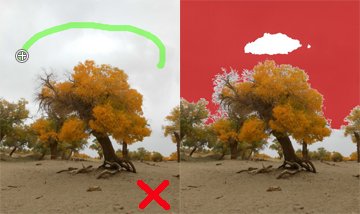
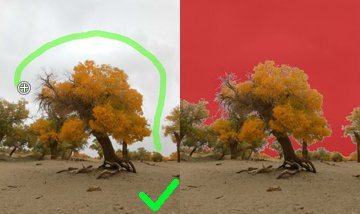
3. Try to mark the pixels as accurate as possible.
Because the Quick Selection Tool selects the pixels similar to the marked pixels, an accurate mark which covers all the features of the area to be selected, can help to make a better selection. For example (see the image below), with the same option settings, drawing a line that covers both bright and dark pixels can get a better selection.
 |
 |
 |
4. Flexibly use it with other selection tools.
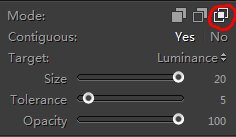
In the Quick Selection Tool panel, there are some options: You can choose whether to add a new selection, subtract from a selection, or select an area intersected by current selections. And you can also choose to select only adjacent areas or select throughout the entire photo. These enable you to make an even more complex selection quickly with flexible use of it and other selection tools.
Example: Create a gradient region across the sky excluding mountains
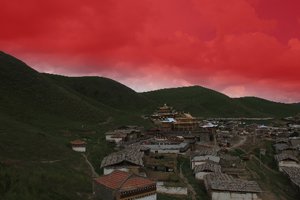
a. Original Picture
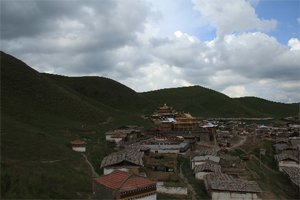
b. Create a rough selection across the sky with Gradient Tool, which covers parts of the mountains.
c. Open the Quick Selection Tool panel, choose Mode [3] – Intersect with current region.
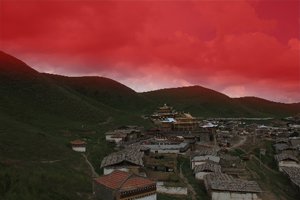
d. Draw a line across both bright and dark pixels.
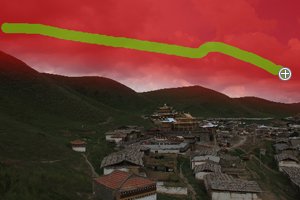
e. Done
Photoshop&Lightroom are trademarks of Adobe Systems Inc.