Using Brush to Whiten Teeth Easily
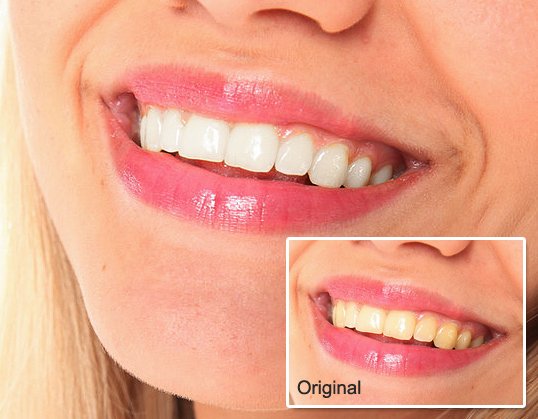
Teeth are often a bit more yellow than we would like to see them in a good portrait shot. Luckily it's easy to whiten teeth in PT Photo Editor. Carefully using it can help to make a good portrait shot even better.
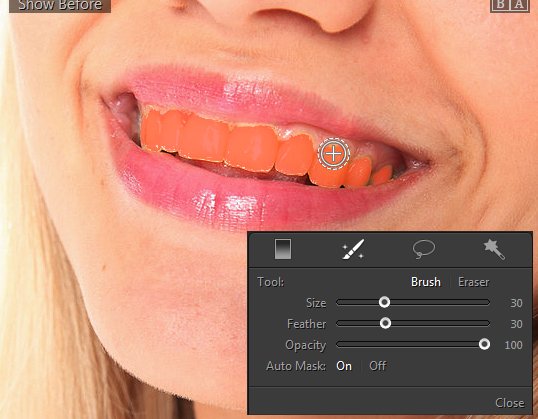
Step 1: Use brush to create an adjustment mask on the teeth area
Open the image, switch to Regional Edit panel, press [B] to select the Brush tool. Set your brush Size and Feather amounts. Turn on the “Auto Mask”. This will help you detect the medium and high contrast edges as you brush the mask across the preview, so that you can brush out the teeth area more precisely and easily.
 |
 |
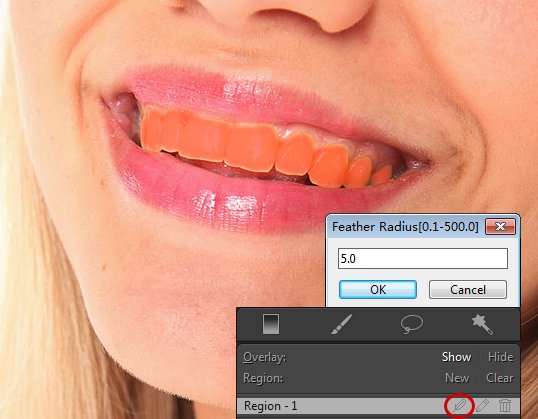
Step 2: Feather the mask edge
A red overlay shows the masked area. After brushing out the entire teeth area, click  and input a feather value to make the mask edge softer.
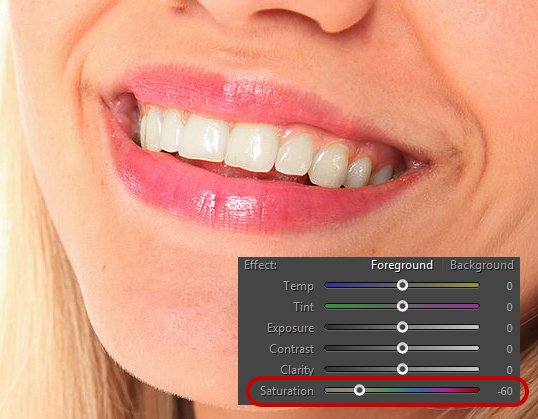
Step 3: Decrease Saturation to remove yellow on the teeth
Press [O] to turn off the red overlay. In Effect Foreground panel, move Saturation down to -60, you can see the yellow has been removed and the teeth appear whiter.
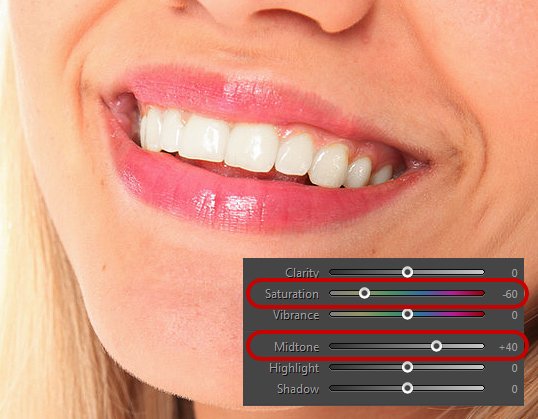
Step 4: Move Midtone up to make teeth white and bright
Though the yellow has been removed, the teeth still look a little dark and unhealthy. So move Midtone up to +40. Now you can see the teeth become white and bright.
You can also use Exposure to brighten the teeth, but be careful not losing the teeth highlight details.
If you think the effect is not good enough, just tweak the Saturation and Midtone sliders until you're satisfied.
Photoshop&Lightroom are trademarks of Adobe Systems Inc.