PT Photo Editor: Top Tips of Using Tone Curves
In photo editing, the Curves is perhaps the most powerful and flexible tool for adjusting tones to brighten, darken, add contrast and shift colors, yet a little more complex than other tonal adjustment tools for beginners.
Think of Curves as a one–stop–shopping source for improving images. This brief tutorial provides 4 top tips of using Curves in PT Photo Editor, hoping this can help you master the powerful tonal tool quickly.
1. Setting White and Black Points
Most images will benefit from containing a full range of tones.
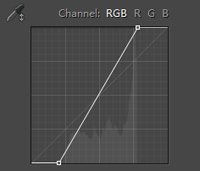
The previous article told you how to use the Levels tool to set the white and black points of an image to expand its tonal range. The same transformation also can be applied using the Curves tool.
Instead of using sliders (as with the Levels tool) the white and black points are adjusted by shifting the anchor points from their starting positions in the top-right and bottom-left of the box.


2. Altering Shadows, Midtones and Highlights
We can also use the Curves tool to alter the shadows, midtones or highlights of an image.
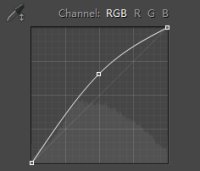
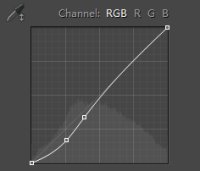
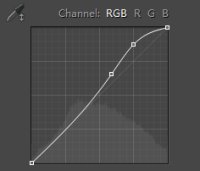
 The left bottom part of the Curve represents changes made to the shadows of a photo (up to lighten, and down to darken), the middle part represents the midtones and the right top part represents the highlights.
To adjust a specific area of the tonal range, you need to add anchor points to control this area of the tonal range by clicking on the Curve, then drag the points up or down to lighten or darken tones.
 |
 |
 |
||
 |
 |
 |
||
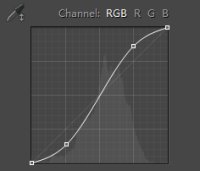
3. The Amazing S-shaped Curve
Made by dragging one point upwards in the highlights and a second down in the shadows (and sometimes with a third to anchor the midtones) the S-shaped Curve is a classic tonal tweak for boosting contrast and color saturation.
The steeper the Curve is, the greater the increase in contrast.
To avoid losing details of shadows and highlights, apply an S-Curve without altering the white and black points.


4. Shifting Colors with Separate Channels
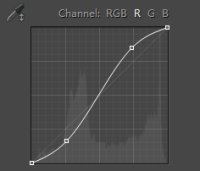
You can tweak different color channels at the top of the Curves box.
By plotting different points along the color line you can shift colors – for example, reducing reds in shadows and increasing reds in highlights as the image shows here.
An upwards drag on the red line adds red and down adds cyan; up on the blue channel adds blue and down adds yellow; up on the green line adds green and down adds magenta.


Photoshop&Lightroom are trademarks of Adobe Systems Inc.
