Rescue Poorly Exposed Photos 3 – Fix Low-Contrast Photos Quickly

The previous two articles are about how to fix underexposed and overexposed photos. But exposure problem not only means too dark or too bright, sometimes a washed out, low contrast look will also ruin an otherwise good shot.
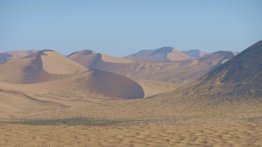
This photo was shot in big sunny day. But the exposure problem makes it look like in a hazy low-contrast fog. Tweaking "Contrast" directly could not achieve a good enough result, so what do you do? Here is a simple way to fix it in 3 steps.

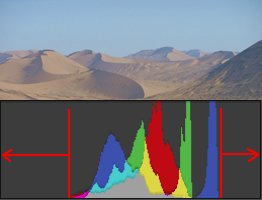
Step1: Check whether the image histogram reaches both left and right edge of the box.
When open the image in PT Photo Editor, you can see its histogram in the top of the left panel. A histogram can help you determine whether an image has enough detail to make a good correction.

This histogram of the original image is typical of a washed out, low-contrast photo. You can see that the "black" or left edge of the histogram does not reach the left edge of the box, and the "white" or right edge of the histogram does not reach the right edge of the box. In an ideally exposed photo, we usually want to take full advantage of the entire tonal range, so use Levels tool to correct this.
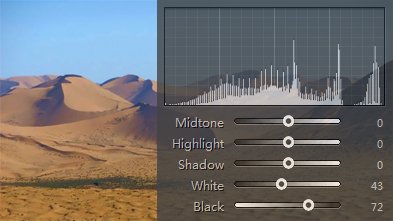
Step2: Use Levels tool to expand the tonal range.
Locate the Levels tool in the right panel below the Basic. To quickly correct the tonal range of the image, simply drag the "White" slider or rightmost part of the histogram to the right until the right edge of the histogram reaches the right edge of the box. Then drag the "Black" slider to the right or drag the leftmost part of the histogram to the left until the left edge of the histogram reaches the left edge of the box. These make the darkest pixels of the image become black and the lightest pixels become white, and the rest are spread appropriately in between.

Step3: Tweak "Contrast" and "Vibrance" sliders until you’re satisfied.
We can see there is a big improvement after Levels adjustment. If you want the image more vibrant and attractive, tweak "Contrast" and "Vibrance" sliders in Basic panel until you're satisfied.
 |
 |
Photoshop&Lightroom are trademarks of Adobe Systems Inc.
