How to Enhance Image Color with Selective HSL Adjustments
In PT Photo Editor, the controls in the "Color" panel enable you to apply selective color adjustments. The Hue, Saturation and Luminance (HSL) portion of the panel contains sliders for adjusting Hue, Saturation, and Luminance individually. These sliders are useful for selective color enhancement. For example, correct skin tone and make sky bluer.
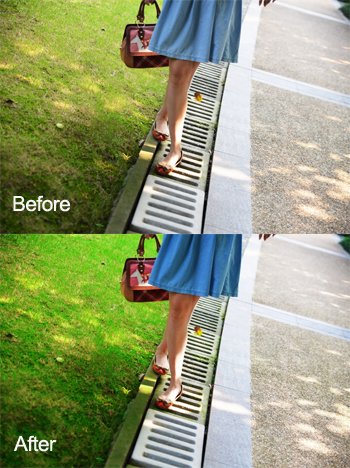
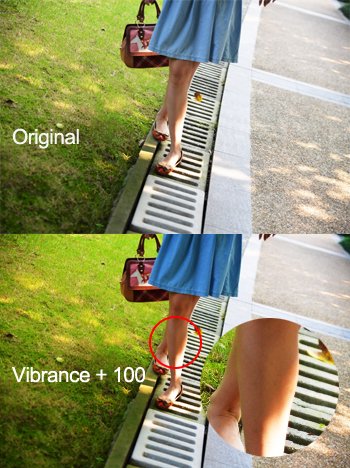
Here is a photo shot in summer. In order to make the photo look more vivid, I move the "Vibrance" slider to the right to enhance the saturation of the entire image. But then I find the skin tone become some oversaturated, so I'll use HSL adjustments in the "Color" panel to correct it.
Correct Skin Tone
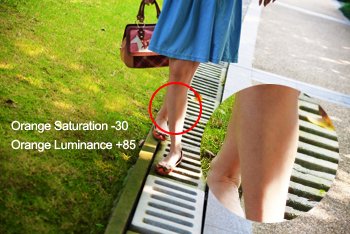
In the "Color" panel, switch to the "Saturation" portion, and reduce the skin tone saturation with the corresponding color sliders. If you can't identify the exact color in the image, use Color Eyedropper  to click on the color area in the image that you want to adjust, then drag up or down to affect all similar colors. In this photo, the skin main color is orange, so I reduce the Orange Saturation to -30. I also think the skin tone looks a little dark, so I brighten it by increasing the Orange Luminance to +85 in the "Luminance" portion. After these, the skin tone looks much better.
Enhance the Color of the Grass
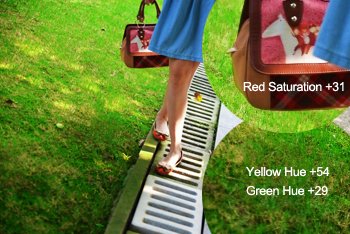
After correcting the skin tone, I decide to enhance the color of the grass because it looks too yellow. This is also very easy. Just switch to the "Hue" portion, turn grass to green by dragging up in the grass area with Color Eyedropper . At last, I increase a little saturation of Red to make the bag and shoes color look more beautiful.
Photoshop&Lightroom are trademarks of Adobe Systems Inc.